# PPIO Cloud
## Cherry Studio Connects to the PPIO LLM API
### [](https://ppinfra.com/docs/third-party/cherry-studio-use#%E6%95%99%E7%A8%8B%E6%A6%82%E8%BF%B0)Tutorial Overview
Cherry Studio is a multi-model desktop client that currently supports installation packages for computers running Windows, Linux, and MacOS. It integrates mainstream LLM models and provides assistance for multiple scenarios. Users can improve work efficiency through intelligent conversation management, open-source customization, and multi-theme interfaces.
Cherry Studio has now been integrated with **PPIO high-performance API channel** with deep adaptation—with enterprise-grade computing power assurance, it enables **high-speed responses for DeepSeek-R1/V3** and **99.9% service availability**, bringing you a fast and smooth experience.
The tutorial below includes a complete integration solution (including key configuration), allowing you to start the advanced mode of "Cherry Studio intelligent scheduling + PPIO high-performance API" in 3 minutes.
### [](https://ppinfra.com/docs/third-party/cherry-studio-use#1-%E8%BF%9B%E5%85%A5-cherrystudio%EF%BC%8C%E6%B7%BB%E5%8A%A0-%E2%80%9Cppio%E2%80%9D-%E4%BD%9C%E4%B8%BA%E6%A8%A1%E5%9E%8B%E6%8F%90%E4%BE%9B%E5%95%86)1. Enter CherryStudio and add "PPIO" as the model provider
First, go to the official website to download Cherry Studio:[ ](https://cherry-ai.com/download) (If you can't access it, you can open the Quark cloud drive link below to download the version you need:
(1) First click Settings in the lower-left corner, and customize the provider name as:`PPIO`, then click "OK"
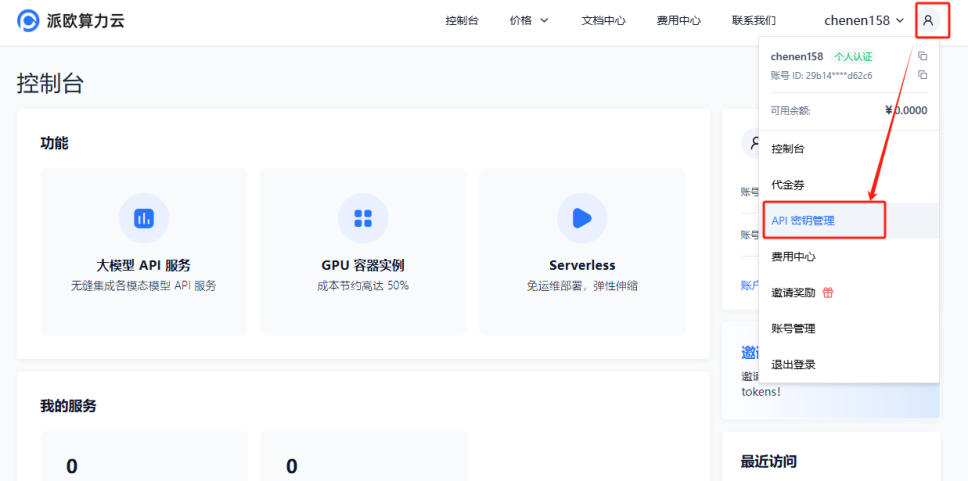
(2) Go to [Paiou Computing Cloud API Key Management ](https://ppinfra.com/user/register?invited_by=JYT9GD\&utm_source=github_cherry-studio), click \[User Avatar] — \[API Key Management] to enter the console
Click the \[+ Create] button to create a new API key. Customize a key name,**The generated key is only shown at the time of generation, so be sure to copy and save it in a document to avoid affecting subsequent use**
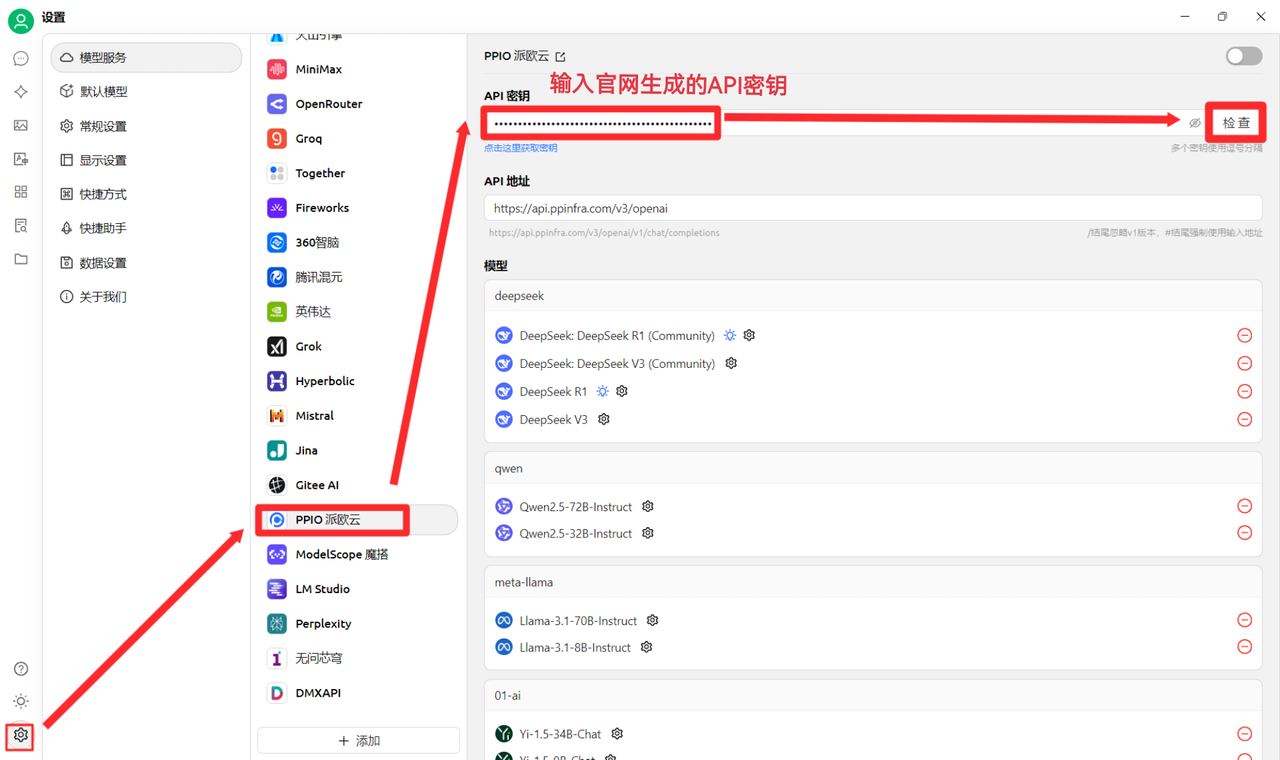
(3) Enter the key in CherryStudio Click Settings, select \[PPIO Paiou Cloud], enter the API key generated on the official website, and finally click \[Check]
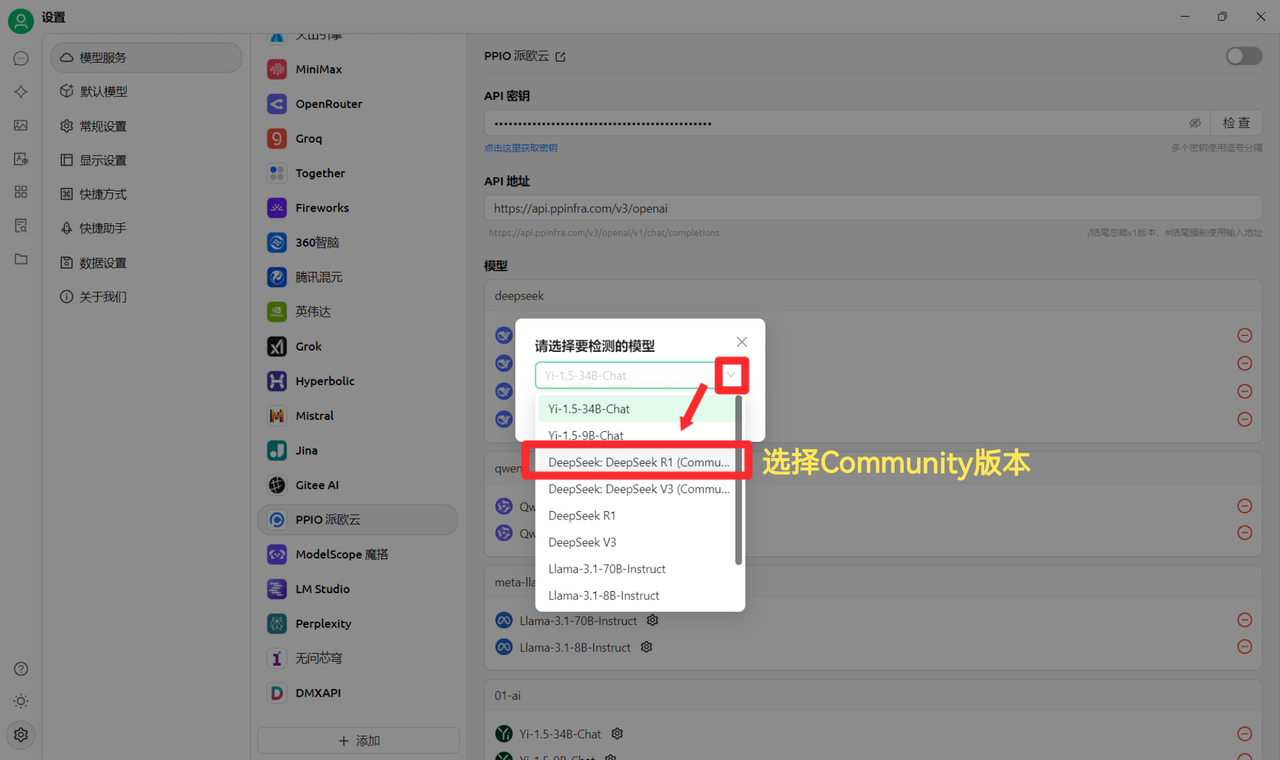
(4) Select a model: take deepseek/deepseek-r1/community as an example. If you need to switch to other models, you can replace it directly.
The DeepSeek R1 and V3 community versions are only for everyone to try out, and they are also full-parameter full-version models, with no difference in stability or performance. If you need to make a large number of calls, you must **top up and switch to the non-community version**.
### [](https://ppinfra.com/docs/third-party/cherry-studio-use#2-%E6%A8%A1%E5%9E%8B%E4%BD%BF%E7%94%A8%E9%85%8D%E7%BD%AE)2. Model usage configuration
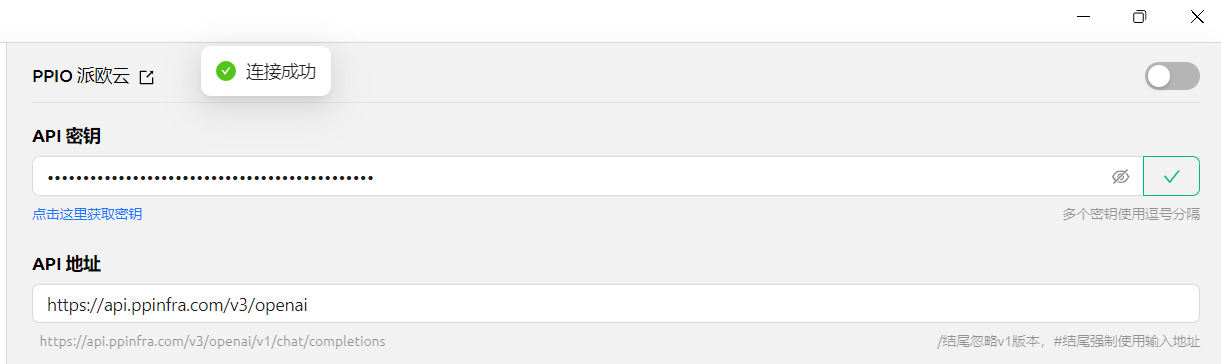
(1) After clicking \[Check] and it shows the connection is successful, you can use it normally
(2) Finally, click \[@] and select the DeepSeek R1 model you just added under the PPIO provider to successfully start chatting\~
\[Some materials sourced from:[ Chen En ](https://www.kdocs.cn/l/ctGiF5K6PQoO)]
### [](https://ppinfra.com/docs/third-party/cherry-studio-use#3-ppio%C3%97cherry-studio-%E8%A7%86%E9%A2%91%E4%BD%BF%E7%94%A8%E6%95%99%E7%A8%8B)3. PPIO×Cherry Studio video tutorial
If you prefer more intuitive learning, we have prepared a video tutorial on Bilibili. Through step-by-step teaching, it will help you quickly master the configuration method for "PPIO API + Cherry Studio." Click the link below to go directly to the video and start a smooth development experience → ["\[Still going crazy because DeepSeek keeps spinning in circles?\] Paiou Cloud + DeepSeek full version = ? No more congestion, take off instantly"](https://www.bilibili.com/video/BV1BZNmeTEwg/?buvid=XX82F37818653072D274A6BB8A4FE7938A30C\&from_spmid=search.search-result.0.0\&is_story_h5=false\&mid=3CpKQv%2Bjnb8k6iTGlUl1eH8FTQ%2FSZMtL1rElX6M3iMo%3D\&plat_id=116\&share_from=ugc\&share_medium=android\&share_plat=android\&share_session_id=b892268f-5751-4f6e-9690-50b37855d346\&share_source=WEIXIN\&share_source=weixin\&share_tag=s_i\&spmid=united.player-video-detail.0.0\×tamp=1739160448\&unique_k=eKDZuRP\&up_id=3546757841554023\&vd_source=50fea165795ccc47455a165f5bcaeed2)
\[Video materials source: sola]
---
# Agent Instructions: Querying This Documentation
If you need additional information that is not directly available in this page, you can query the documentation dynamically by asking a question.
Perform an HTTP GET request on the current page URL with the `ask` query parameter:
```
GET https://docs.cherry-ai.com/docs/en-us/pre-basic/providers/ppio.md?ask=
```
The question should be specific, self-contained, and written in natural language.
The response will contain a direct answer to the question and relevant excerpts and sources from the documentation.
Use this mechanism when the answer is not explicitly present in the current page, you need clarification or additional context, or you want to retrieve related documentation sections.